What is the Dulux Promise?

“I’m about to repaint my walls. How do I make sure I get it right”
A lick of paint is an easy and affordable way to give a room an instant update but, according to an AkzoNobel survey, around one in 10 people say they are put off decorating because they don’t know where to start.
Our handy decorating tips check-list arms you with all the tools and tricks you need to get a professional-looking finish – whether you’re a first-time painter or a regular re-decorator.

You will need
- A tin of paint in the colour of your choice
- A paint roller and tray
- Paint brushes – one medium-sized, one small
- Masking tape
- Drop cloths or plastic sheeting (for covering furniture and fixtures)
- Absorbent cloths (for dusting down walls and wiping up spillages)
- A step ladder (for getting at those hard-to-reach spots)
- Some white spirits (for dealing with accidental paint drips)

1. Pick your paint
The colour of your walls has a huge impact on the overall look and feel of a room, so it’s important to get it right. If you’re struggling to choose, the Dulux Visualizer app gives you an instant digital impression of your wall colour, so you can try out different shades before you pick up a paint brush.
Once you’ve found your perfect shade, you can use the Dulux paint calculator to work out exactly how much you need to buy.

2. Reach for the tape
Cover wall sockets, window frames, coving, door hardware, and anything else that you don’t want to paint, with masking tape. Make sure you apply it in a neat, straight line so the edge of your paint turns out equally neat.

3. Cover Up
It’s usually a good idea to remove all furniture from the room, but if you don’t have the space, cover it with drop cloths or plastic sheeting instead. Plastic carrier bags are a cheap and easy way to protect things like light fittings.
You should always place a drop cloth underneath the area you are painting, ideally taping it down. Paint drips have a tendency to sneak onto your floor no matter how careful you are, so it’s better to be safe than sorry.

4. Dust down your walls
To get an ultra-smooth finish, it’s essential that you dust down your walls before you start to paint. A quick once over with a dry cloth is usually all it takes. Take extra care in the top corners of the room where there might be cobwebs.
This is also a good time to sand down any uneven patches and remove any old nails or screws in your walls, filling in the gaps with a multi-purpose filler if needed.

5. Get Painting
You don’t normally need to use a primer on walls that have already been painted, so now ‘s the time to crack open your paint tin.
Stir your paint with the mixing stick and pour some into your roller tray. Use your medium-sized brush to paint the outer 10 centimetres of your wall, going over the edges of the masking tape. Use the roller to fill in the rest. The key to achieving a smooth, even finish is not to overload your brush or roller.
Leave the first coat to dry then, if needed, apply another. You may need a third coat if you’re going for a dramatic colour change.

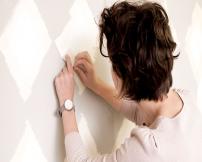
6. Peel off your tape
When your paint is almost dry, carefully peel off your masking tape. If you wait until your paint is completely dry, you risk pulling off sections of paint with your tape. If this does happen, you can always do a bit of touching up with your small paint brush.

7. Stand back and admire your handiwork
That’s it! You should now be the owner of a set of smooth, perfectly even walls just waiting to form the backdrop to your brand new decorating scheme.
Top tip
When using a roller, paint in V or W-shaped strokes rather than up and down or from side to side. This will give you an even, stripe-free finish.


